

It’s finally here! The easy to use, free, RVC notebook! It’s the app which lets you replace the voice in your favorite song with yourself, another singer, an anime princess, or just about anything. RVC also works great for simply changing the voice in spoken text.
We'll take a song and a voice sample, then blend them together to create something unique. To get started, follow this link to our Kaggle notebook, and click “Copy and Edit” to fire up your own copy.
Don't forget to sign in to Kaggle and ensure you've got a GPU accelerator, an internet connection, and file persistence switched on. Once you're set up, hit that Run button next to the first code block to kick off the installation process.
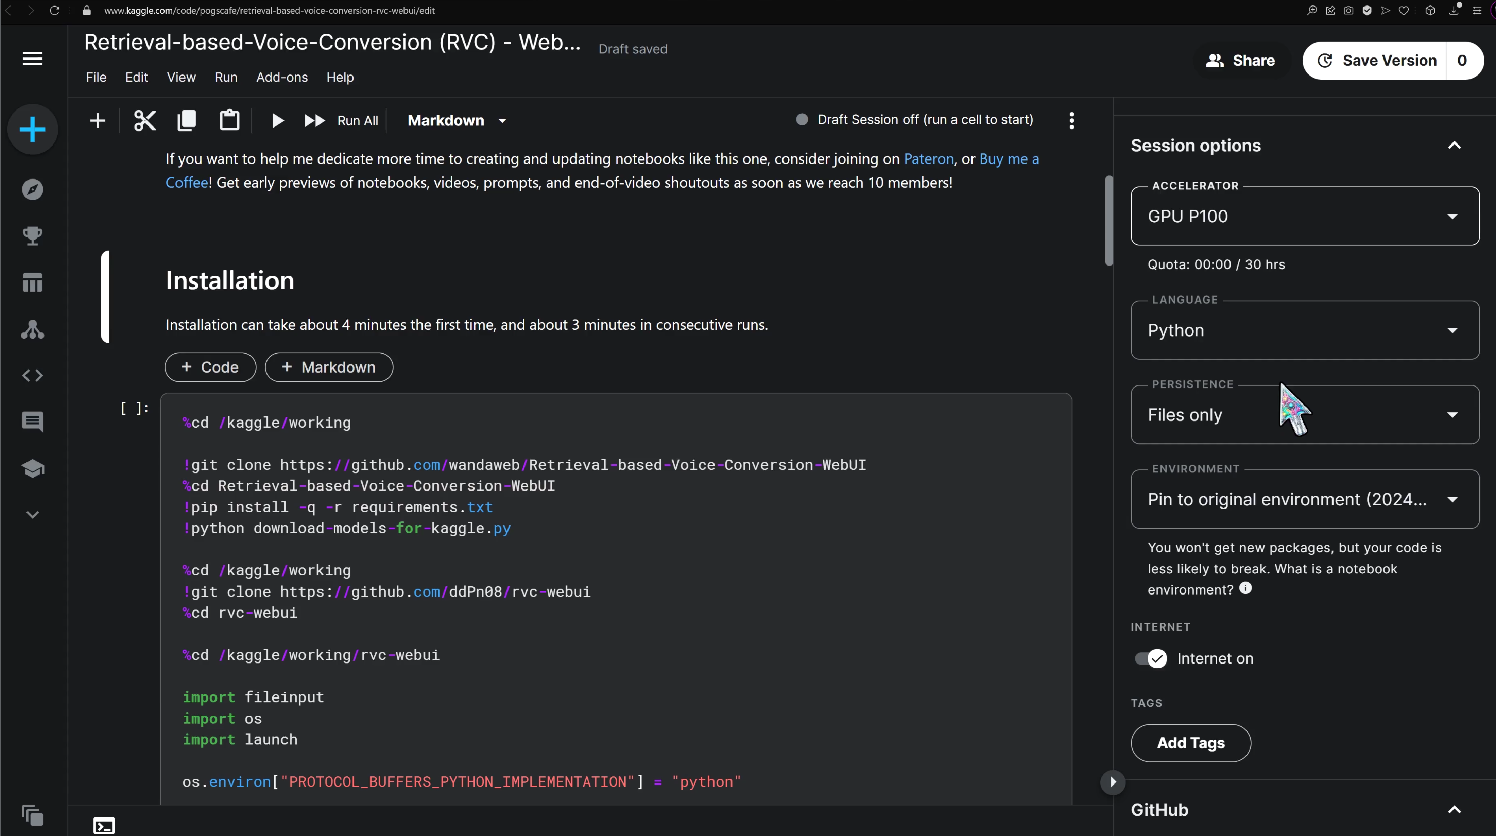
The first installation usually takes about 4 minutes. While waiting, I'll go grab a royalty free song to use as an example.
https://www.freemusicpublicdomain.com/royalty-free-ballads/
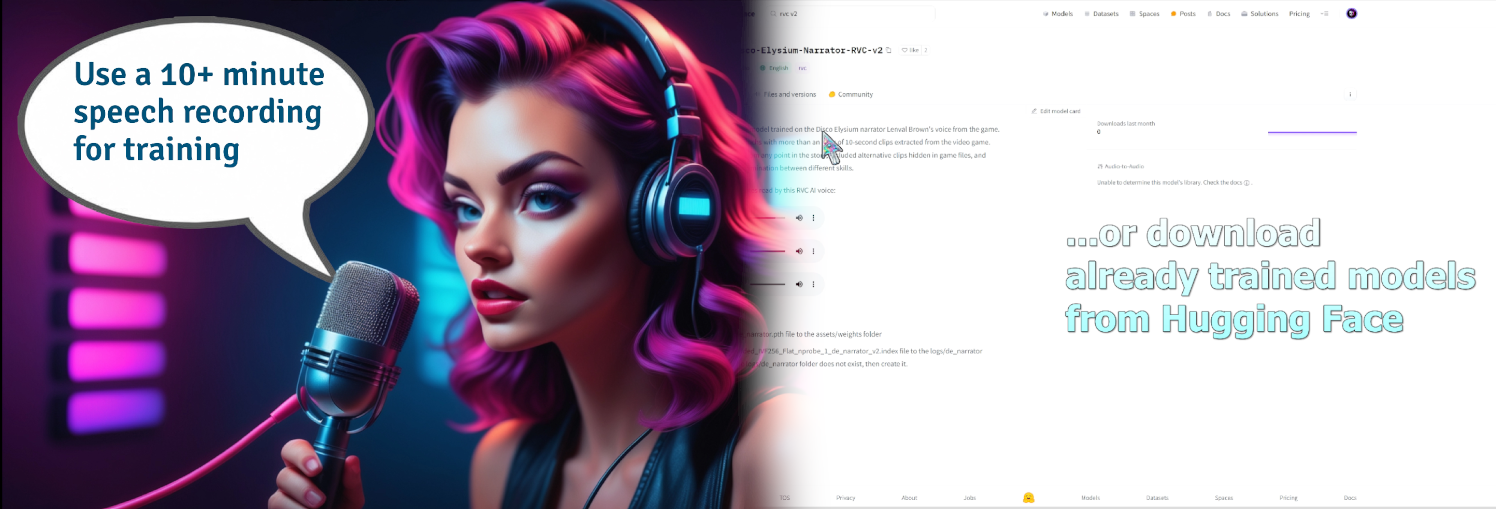
To replace the vocals, I took a 10 minute AI voice recording. A real voice would make the result more natural, but we’ll keep it synthetic for the first run. If you've got your own voice recordings, even better! You can upload them and use the extract code block to clean up any background noise. And don't worry if you don't have any voice recordings - we'll explore some awesome voice models on Hugging Face later in the video.
There’s a handy code block for downloading mp3 files from the web, but since I’ll also be adding an AI text sample, I’ll use the File Browser for both. Simply start the File Browser code block, enter "admin" and "admin" if it asks for a password, and navigate to a folder where you’d like to upload your files. I’ll create an Input folder for the voice recording - there should be one separate folder for each voice, and I’ll put the mp3 file in my song folder.
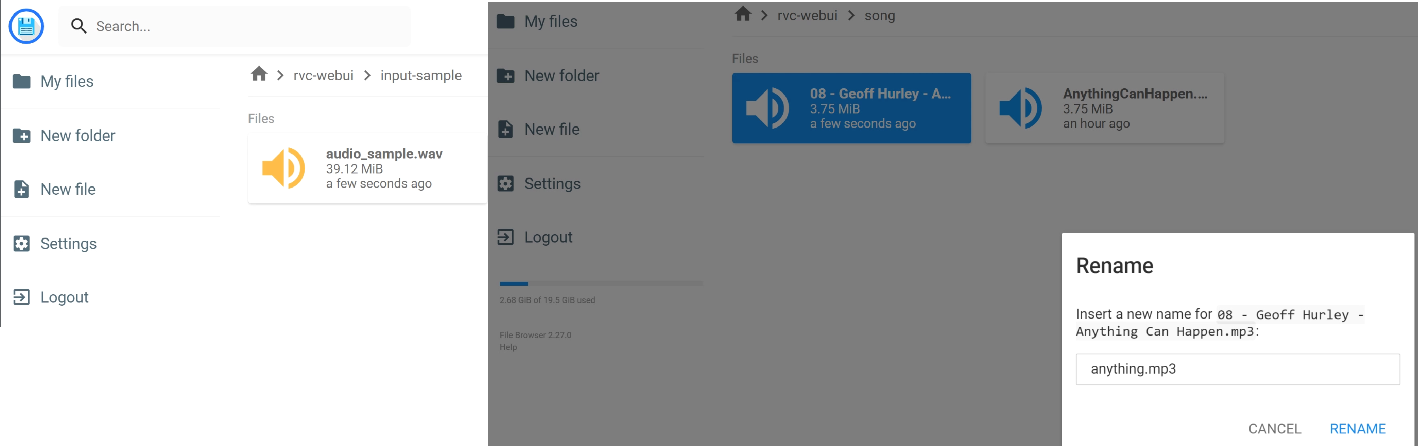
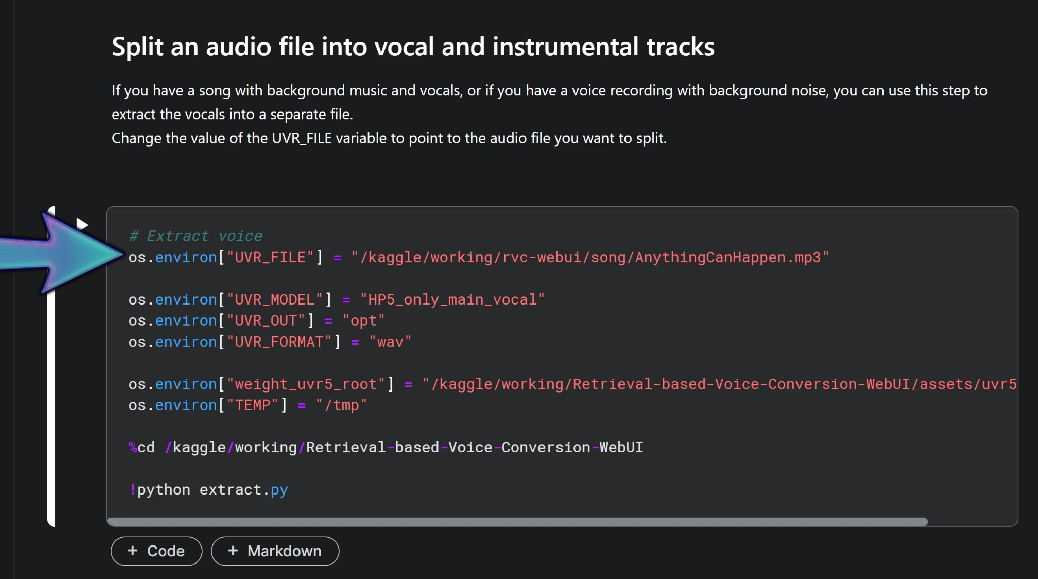
I like to delete any spaces and odd characters in the mp3 file name to avoid potential errors. Once your files are uploaded, it's time to extract the vocals and instrumental tracks. Just enter the path to your uploaded MP3 file in the UVR_FILE variable. The path can be easily found by clicking the copy path icon in the file browser on the right. Then hit run, and when the code executes, you'll find the separate tracks in the opt folder. Now, let's move on to replacing those vocals with our sample voice.
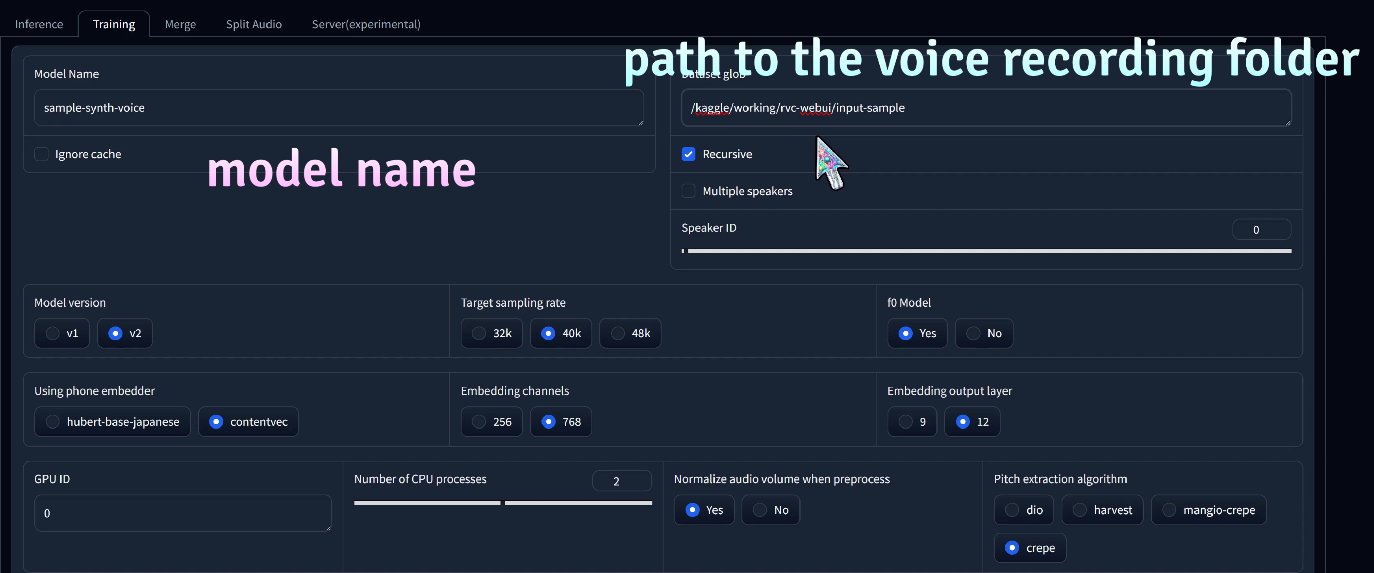
Run the WebUI code block, click the pinggy.link URL to access the UI, and head over to the training tab. Here, we can turn our sample recording into a model, which can be used to generate a clone of that voice. Simply give your model a name, paste the path to your audio recording, and let the training begin.
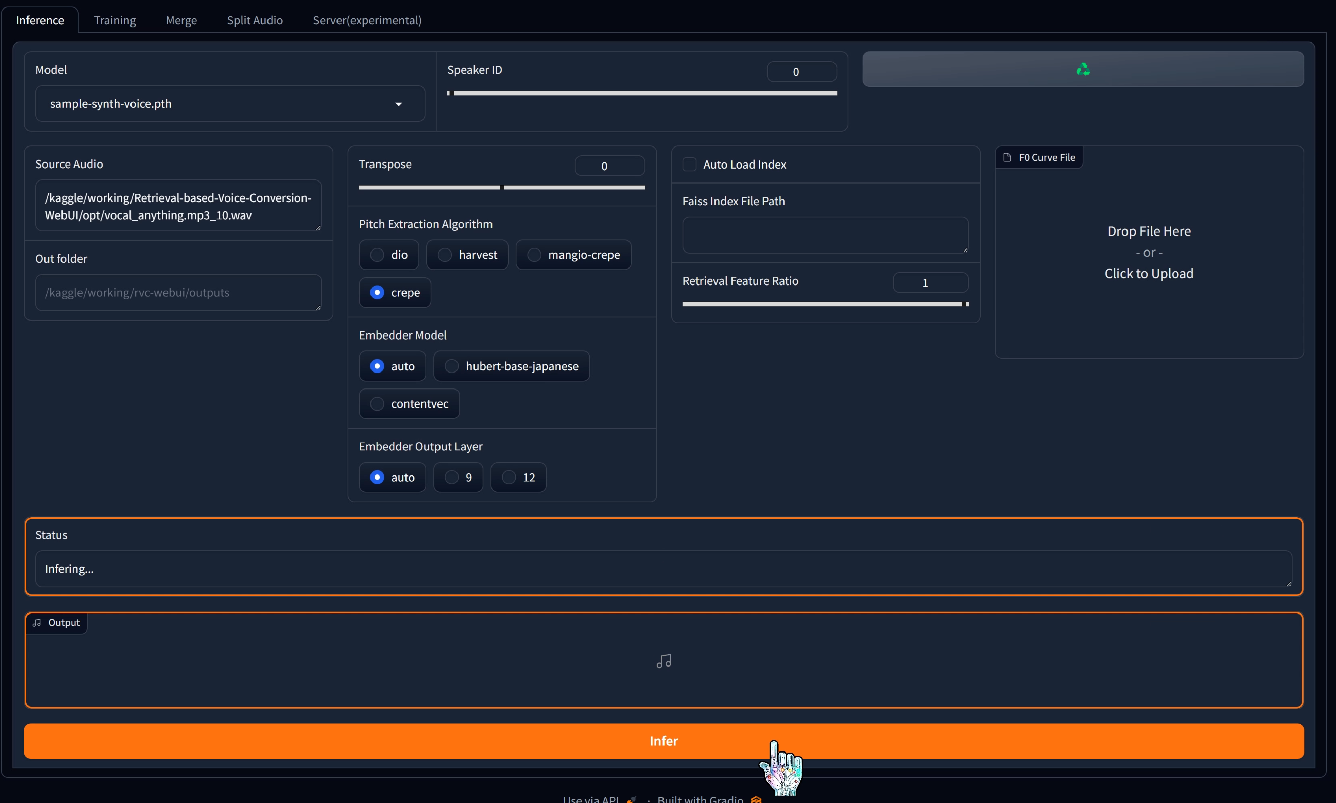
You can view the training progress in the notebook. Once your model is ready, hop over to the inference tab. Click the refresh models button, and the new voice will show up in the Model dropdown menu.
With the model selected, let's fill in the path to the audio track to be replaced. We'll select the vocals we extracted from the mp3 song earlier. Now click infer to kick off the generation process. The synthetic vocal will be saved in the outputs folder, and we can listen to it in the audio player. Here's a quick comparison with the original vocal.
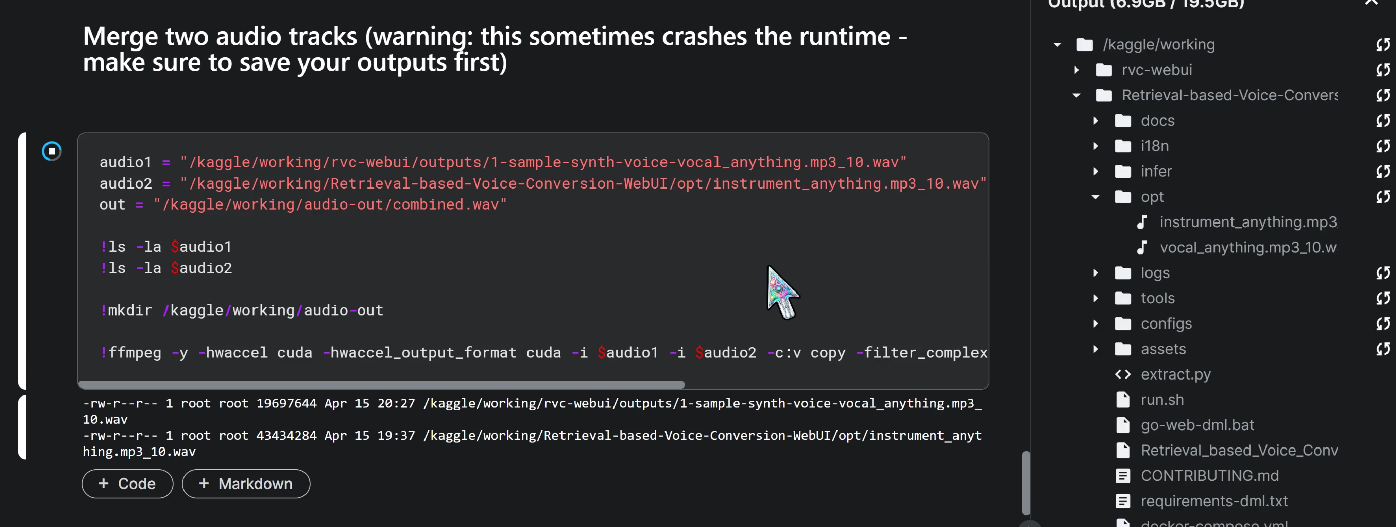
Now that you've got your new vocal track, it's time to merge it with the instrumental track using your favorite audio editing app. To download the track, grab it from the outputs folder, either in the Kaggle interface, or by starting the File Browser. We've got a step here that merges the vocal and instrumental tracks using ffmpeg, but be warned - it can be resource-intensive and might crash your runtime. So, make sure to download your work before giving it a spin. If the merge is successful, the output will be in the audio-out folder.
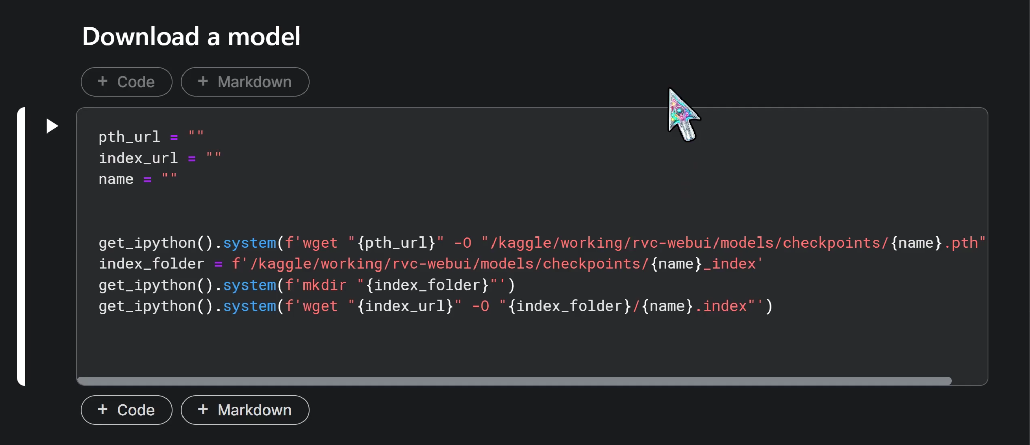
Speaking of saving our work - where is that model, anyway? We need two files if we want to share our models: the .pth file and the .index file. These are in the checkpoints folder, with the .index file being in a separate folder, named after the model. We can use the checkpoints folder to upload other models as well.
There’s a convenient code block in the notebook that puts the model files in the correct locations, as long as we have both links. Let's go find an unzipped model on HuggingFace and give it a whirl!
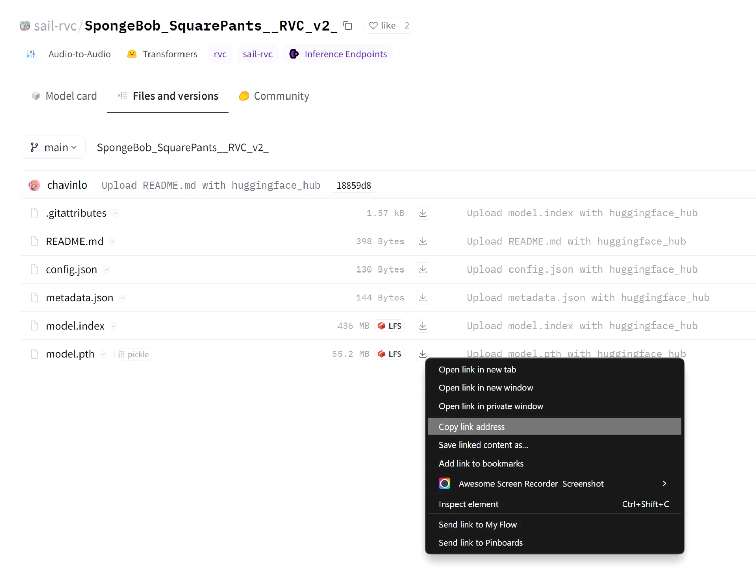
The Spongebob one looks perfect! I’ll copy the links and paste them to the notebook. Let's give it an appropriate name, and let the notebook download everything. To test it works, I'll run the web UI again, and this time select the spongebob model. I'll use the same audio track from the previous example. With the generation done, I'll run the final step of combining it with the background track.
I haven’t played the whole output in the video, but the links are in the notebook, so you can recreate the full song from the tutorial, without needing to find your own resources. As always, thanks for reading and happy generating!