wandaweb
15 July 2023
To install ffmpeg on Windows, follow these step-by-step instructions:
- Open a web browser and head over to the releases page on https://github.com/BtbN/FFmpeg-Builds/releases
Alternatively, find a suitable release on the official web site, https://ffmpeg.org/download.html - Download a release for your Windows system
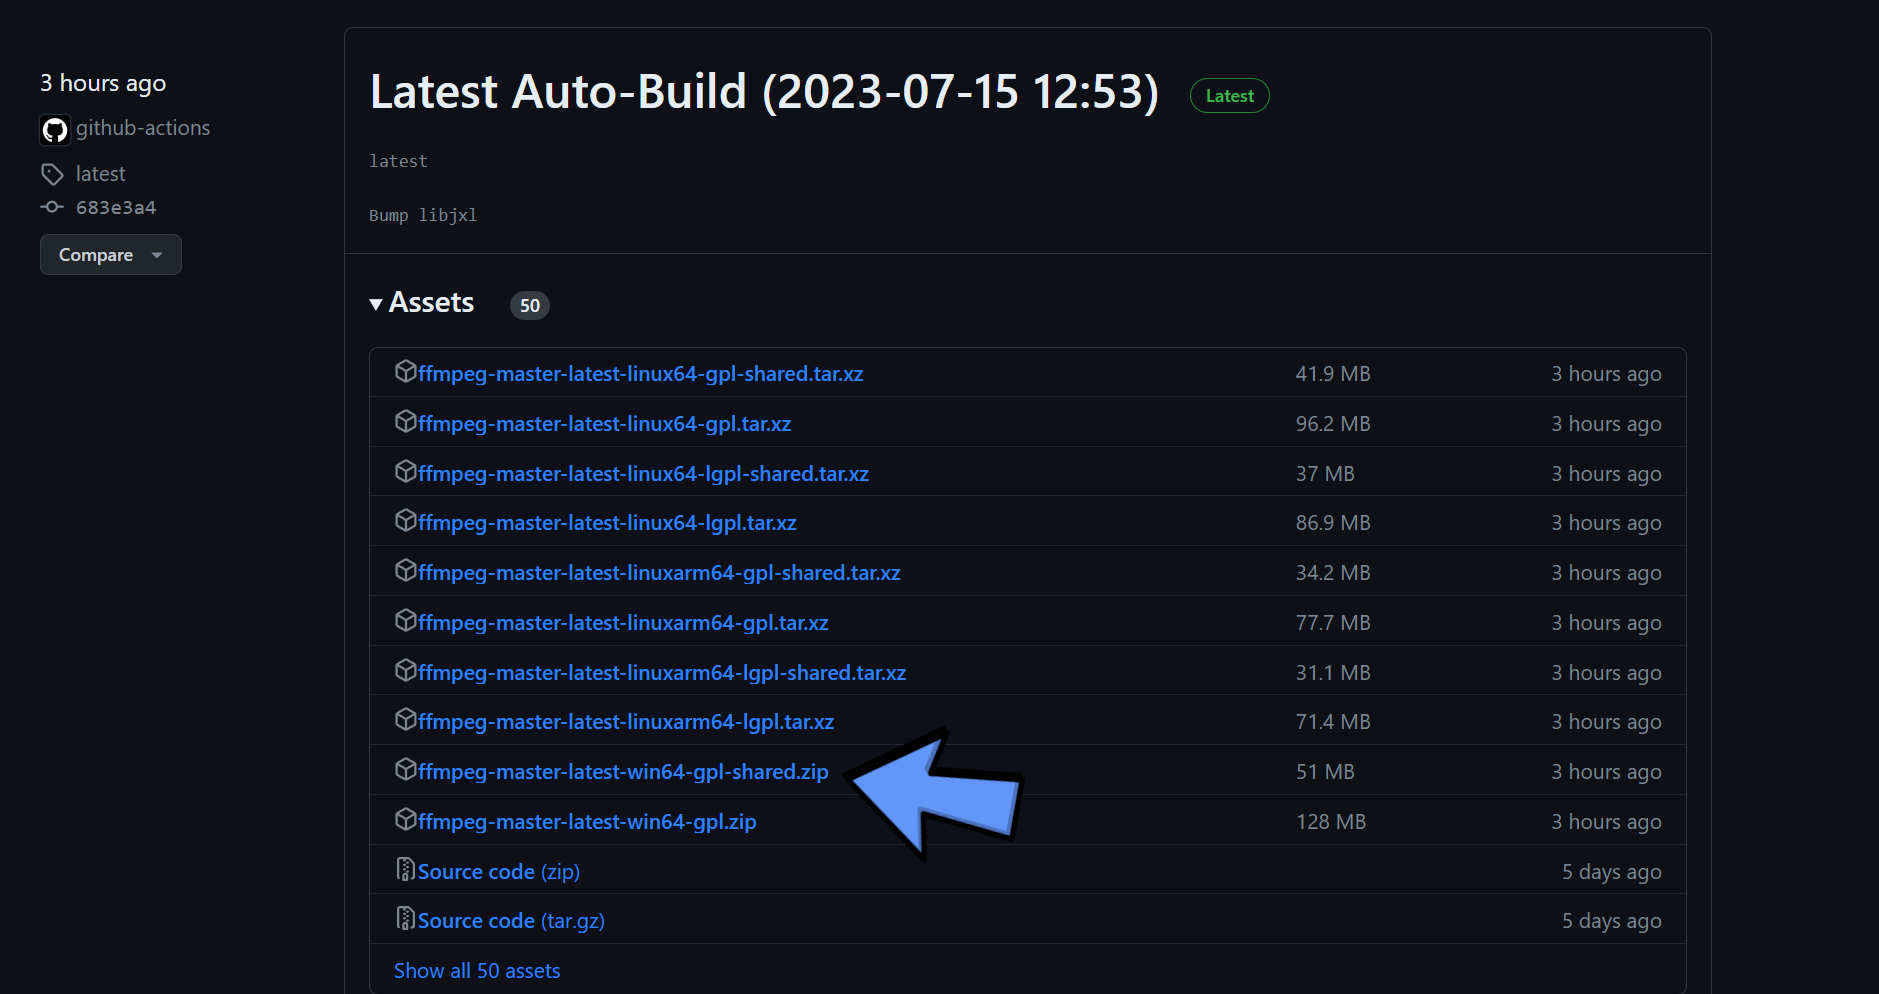
- Extract the zip file to a local folder, for example, C:\tools\
- Navigate to the folder where you extracted the files and look for the executable, ffmpeg.exe. It's usually in the "bin" subfolder.
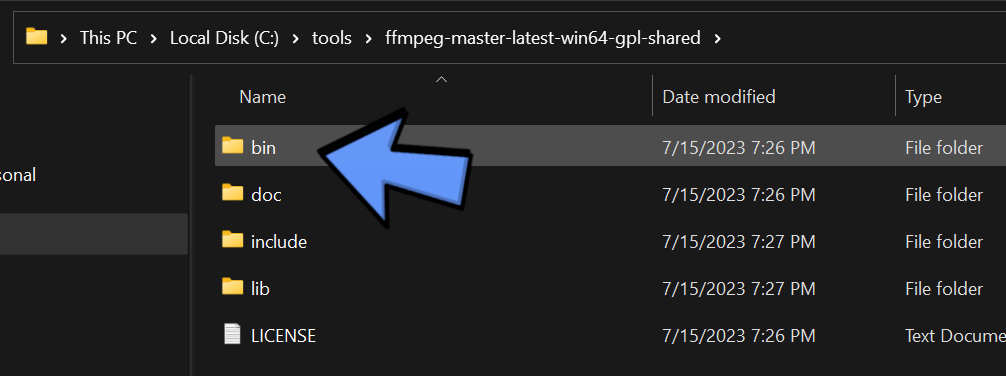
- Copy the path to the folder containing ffmpeg.exe

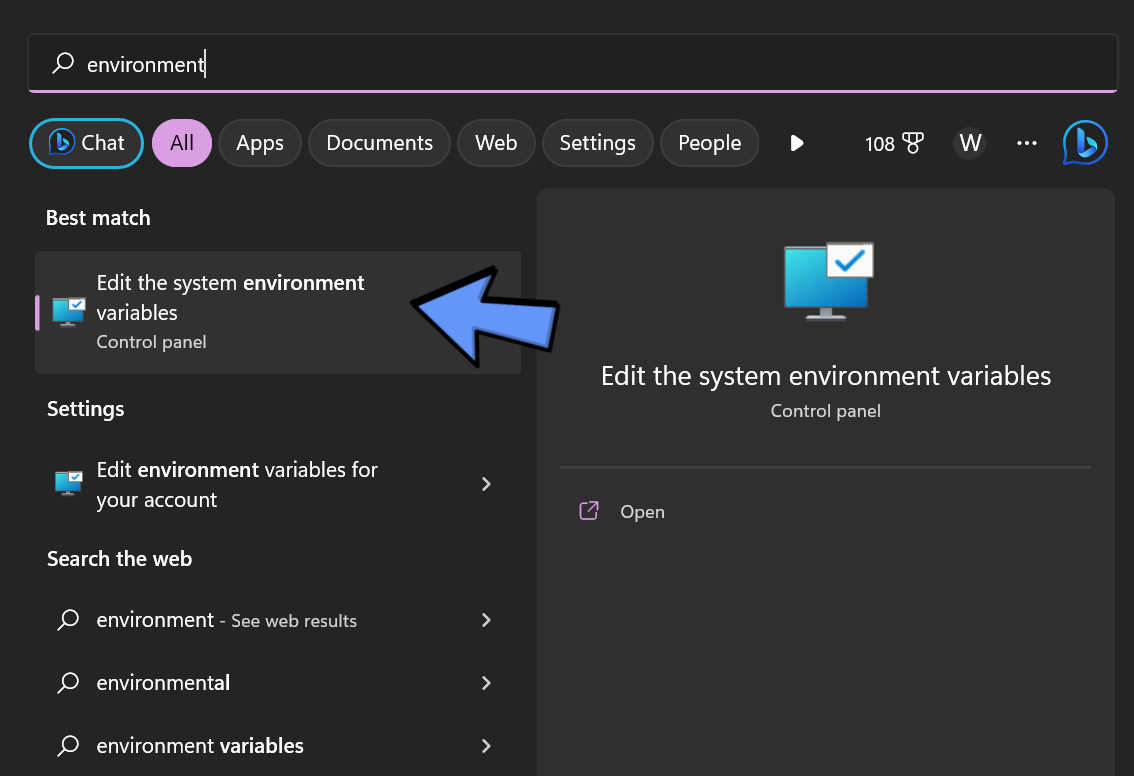
- Click the Start button and search for "Environment variables". Click on the result: Edit System Environment Variables
- Click the Environment Variables button in the lower right hand corner of the System Properties window.
- In the next window, double click the Path variable, either in User variables or System variables.
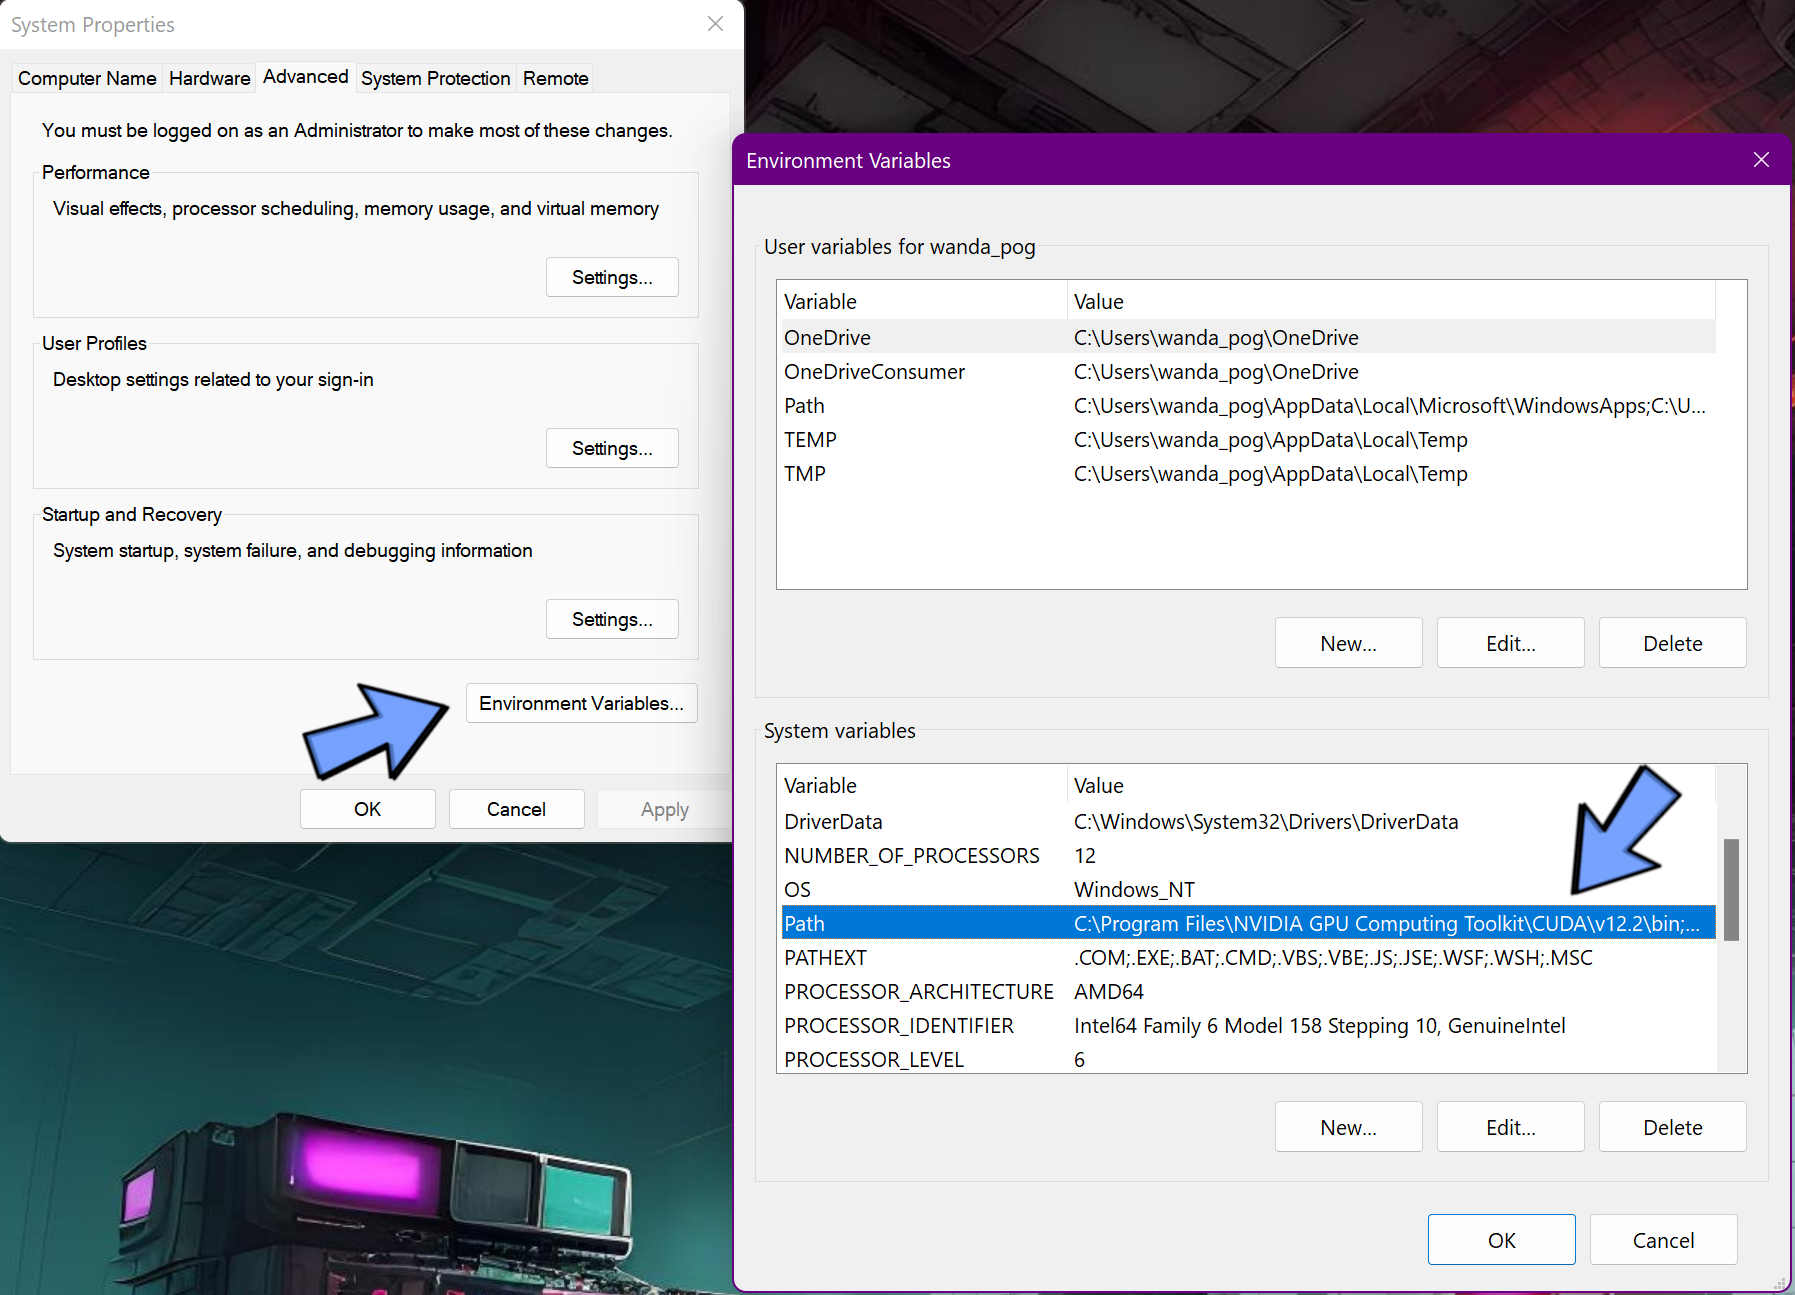
- Click the New button and paste the path copied in step 5.
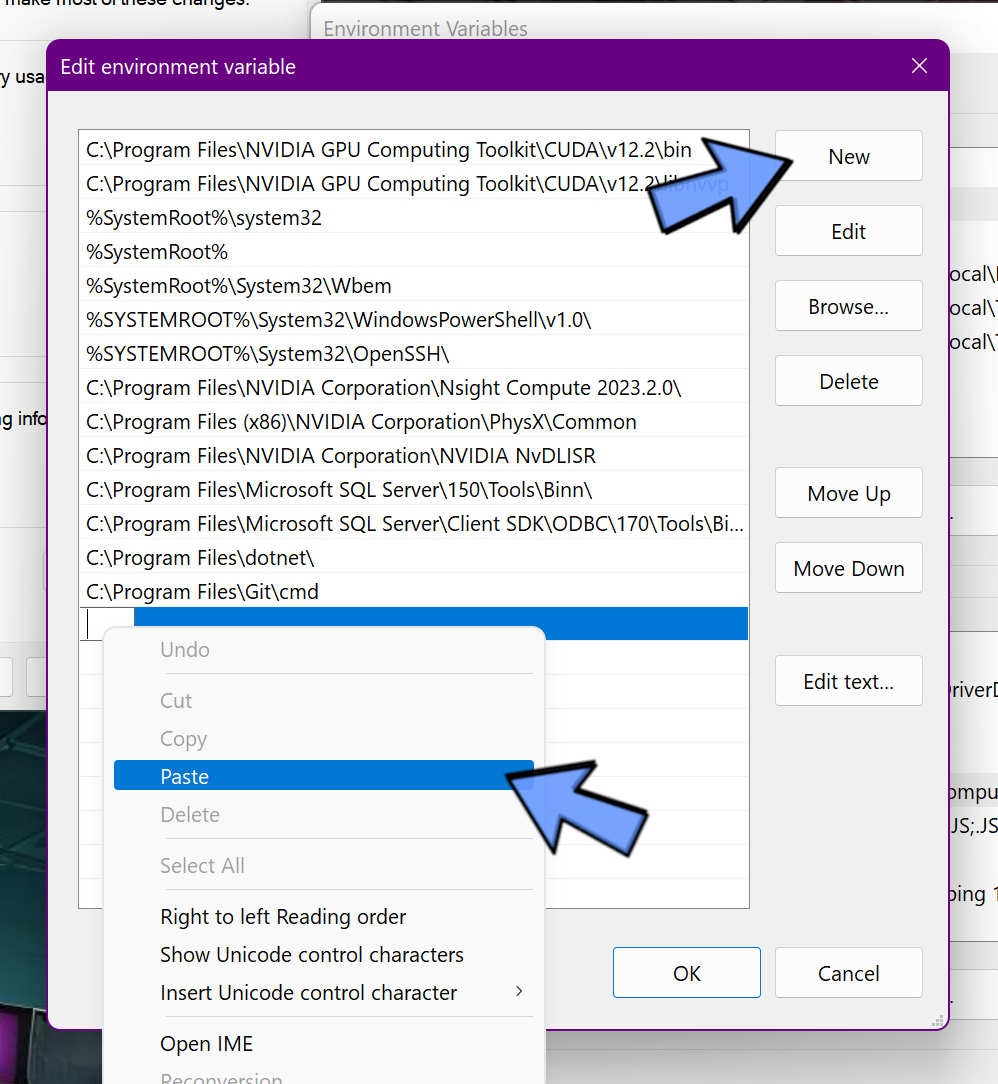
- Click OK to save changes.
- Open a new Command Prompt window by pressing the Windows key and searching for "Command Prompt" or "cmd."
- In the Command Prompt window, type "ffmpeg" and press Enter. If the installation was successful, you should see the ffmpeg version information and command options displayed.
Congratulations! You have successfully installed ffmpeg on your Windows system. You can now use it to perform various multimedia tasks and command-line operations.
