
Update: With version 3.3.x it's best to run it with Kaggle, on the P100 GPU runtime, as it offers 29 GB of RAM, which is needed for the new version's high memory requirements.
We made a Jupyter notebook for running InvokeAI on Colab. We're still testing all options, but, so far, generating SDXL images with the base and refiner model has been successful.
Github repo for the Kaggle notebook
Github repo for the Colab notebook
For a quickstart, it's enough to run steps 1 (installation), 2 (configuration) and 7 (running the app). It's OK to uncheck "useGoogleDrive", as there will be enough space for about 2 models on the disk.
Step 5 will automatically save future images to Google Drive, but if you already generated some images, you will need to save them manually.
Run step 3 if you want to download the SDXL base model before starting the app, instead of installing it from the web UI.
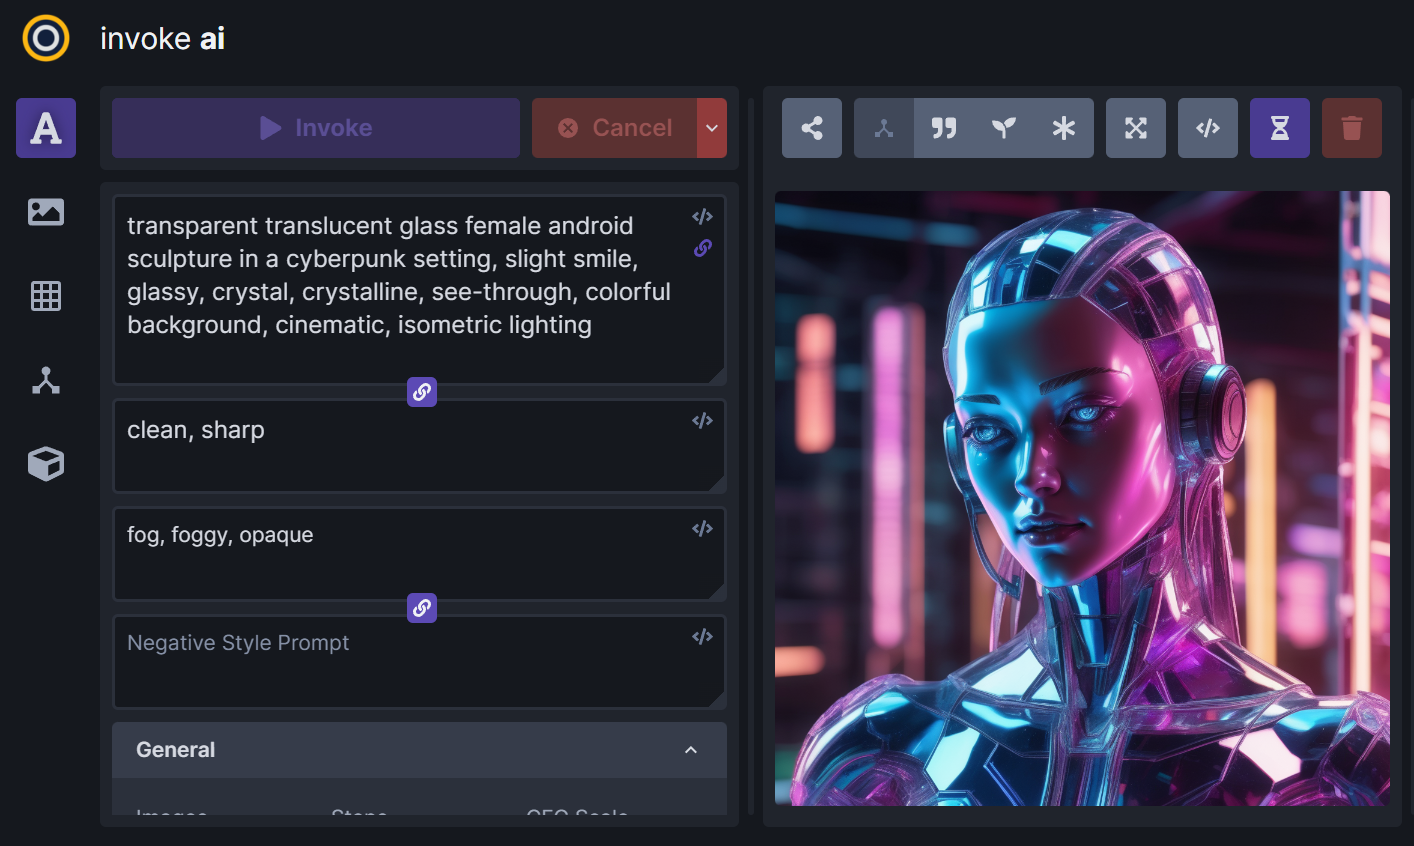
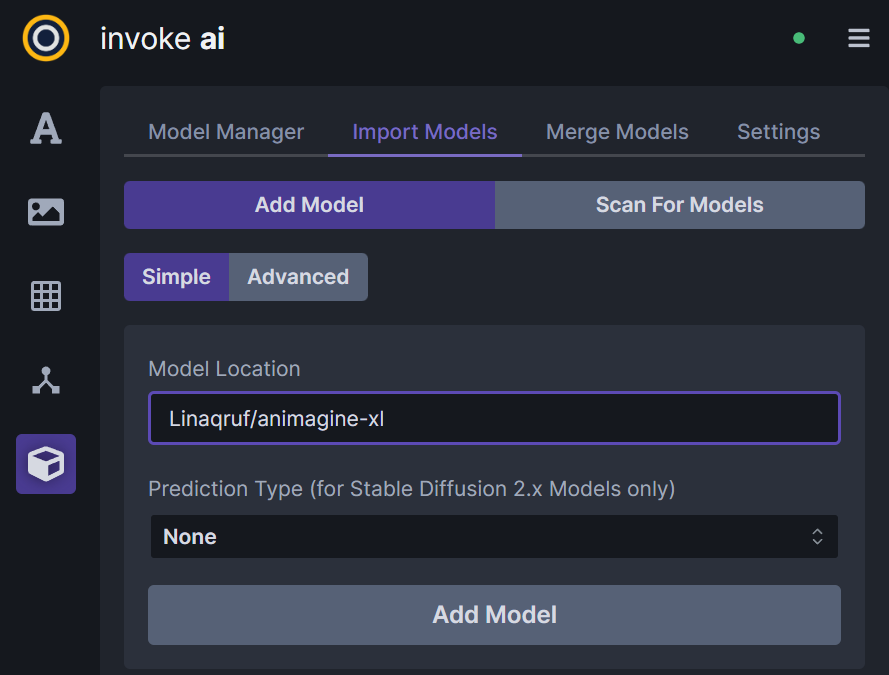
To create stunning images, you'll need a model. If you didn't install a model in step 3, you can easily add one via the web UI. Here's how:
- Navigate to the Model Manager by clicking the box icon in the left-hand menu.
- Click on the "Import Models" tab.
- Paste the model's ID. You can choose from a variety of models, such as
stabilityai/stable-diffusion-xl-base-1.0,Lykon/dreamshaper-xl-1-0orLinaqruf/animagine-xl.
If you plan to save a model to Google Drive for faster access, make sure you have a Google account with at least 7 GB of free space. You can use a CPU runtime just for storing models on Google Drive and then switch to a GPU runtime when generating images.
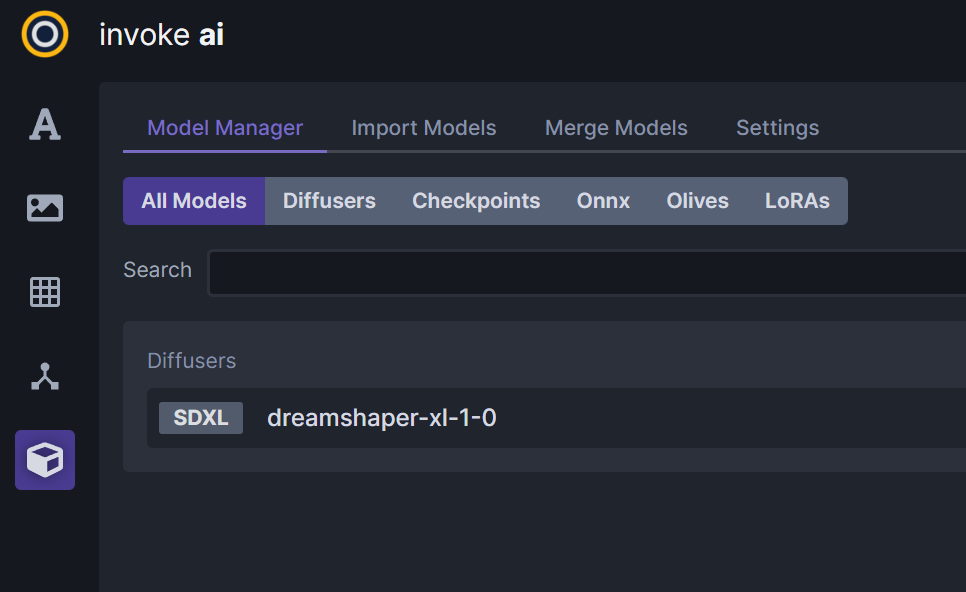
Models from Hugging Face can be easily added from the web UI. Two models that we tested are DreamShaper, and Animagine. Keep in mind that installing a model may take approximately 10 minutes. Once the installation is complete, you'll find the model listed in the Model Manager.
If you saved models to Google Drive in a previous run, they can be imported on the Import Models page by copy-pasting the full path to the model's folder.
In the latest version we used, 3.1.1, we were not able to use custom .safetensors models and LoRAs on the free tier, but this issue was resolved when using Colab Pro.
Suggestions, fixes and comments are always welcome!