
Hey, creators! Today we’re exploring the fascinating process of turning images into videos with Stable Video Diffusion.
We have a handy Kaggle notebook ready to create some amazing videos right from the browser before you decide if you want to spend time exploring this tool in more depth or on your own machine. Follow this link to the notebook and hit "Copy & Edit" to get started.
https://github.com/wandaweb/ComfyUI-Kaggle
If you're new to Kaggle, ensure your account is verified with a phone for GPU access and internet connectivity. Consider also enabling file persistence to save your work for future sessions. Now, let's jump into the action.
Click the "Run" button next to the Installation code block to set up ComfyUI. By default, it installs the AlbedoBase model, but feel free to switch it if you have a preference. This step makes sure ComfyUI and all the necessary nodes for video generation are ready.
With the installation complete, click Run next to the “Starting the Web UI with pinggy” block, and wait for the line that says the app is running on a local URL. Then follow the link ending with pinggy.link to access the user interface.
Text-to-Video (Example 1)
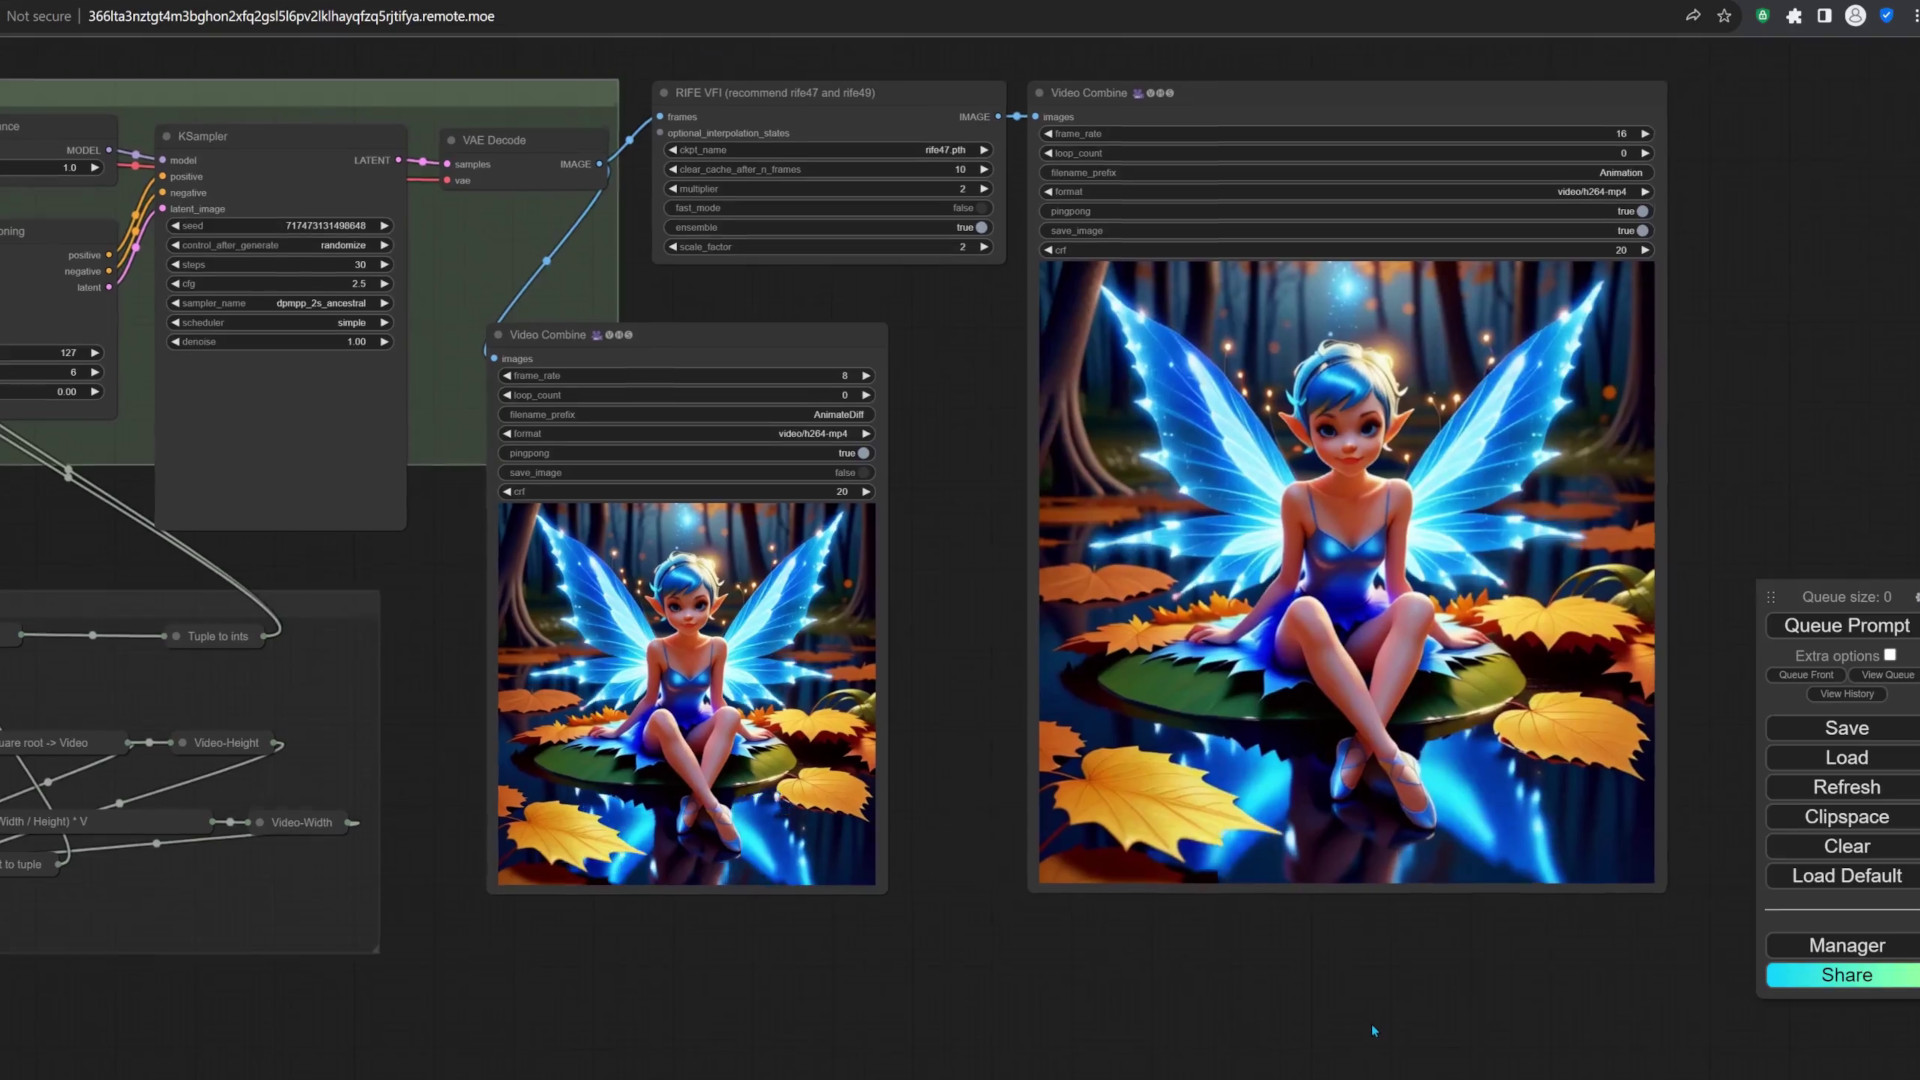
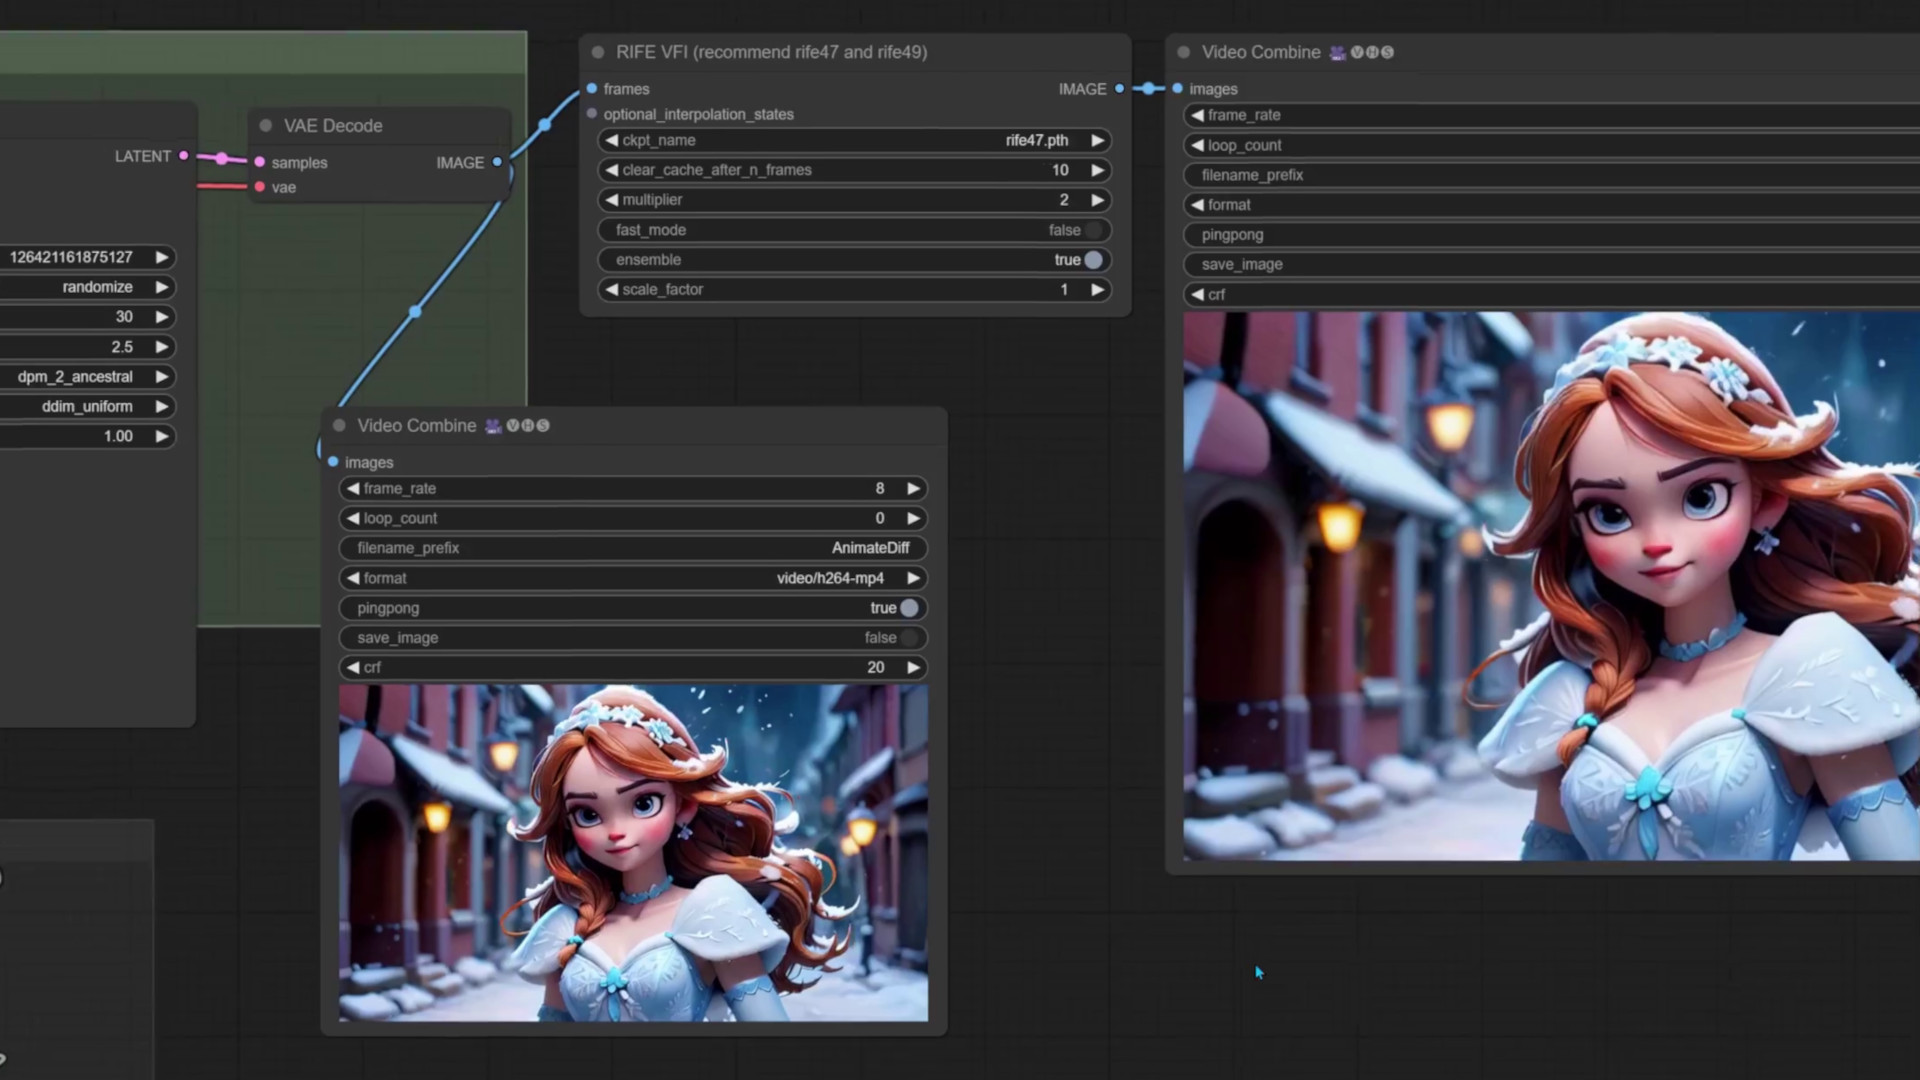
Grab the text-to-video workflow from the Sample-workflows folder on GitHub, and drop it onto ComfyUI. You can explore the workflow by holding down the left mouse button to drag the screen area, and use the mouse scroller to zoom into the nodes you wish to edit. To start generating the video, click the Queue Prompt button. Stable Video Diffusion transforms images into videos, so it's a two-step process: we create an image, and then generate the video. The video on the left here is the original video created by the SVD model, and the one on the right was modified by a frame interpolation node to have a higher frame count for a smoother effect. The whole workflow can take about 20 minutes, so, in the next attempt we’ll start by generating images until we find the perfect video candidate.
Managing Models
Before switching to image-to-video workflows, let's download some extra flair. Use the "Install a LoRA" block to give your images specific styles like Samaritan and Dark Fantasy. Ensure the LoRAfile name ends with .safetensors, so that ComfyUI can recognize it. I prefer downloading models to temporary storage to avoid running out of space. But if you fill up your permanent storage, don’t worry! There’s a block in the notebook that lets us delete models we no longer need. How do we know what the model is called? By running the block which lists models, and replacing the model name in the path. there is another block that lists all big files to help identify anything you might want to remove.
Now let’s grab those new models. When downloading either checkpoints or LoRAs, I use a private window to make sure the notebook will be able to access the download link. If the download doesn’t start, the notebook won’t be able to grab the file either.
We’re downloading a Turbo checkpoint model, which requires fewer steps compared to standard SDXL models, and speeds up generation.
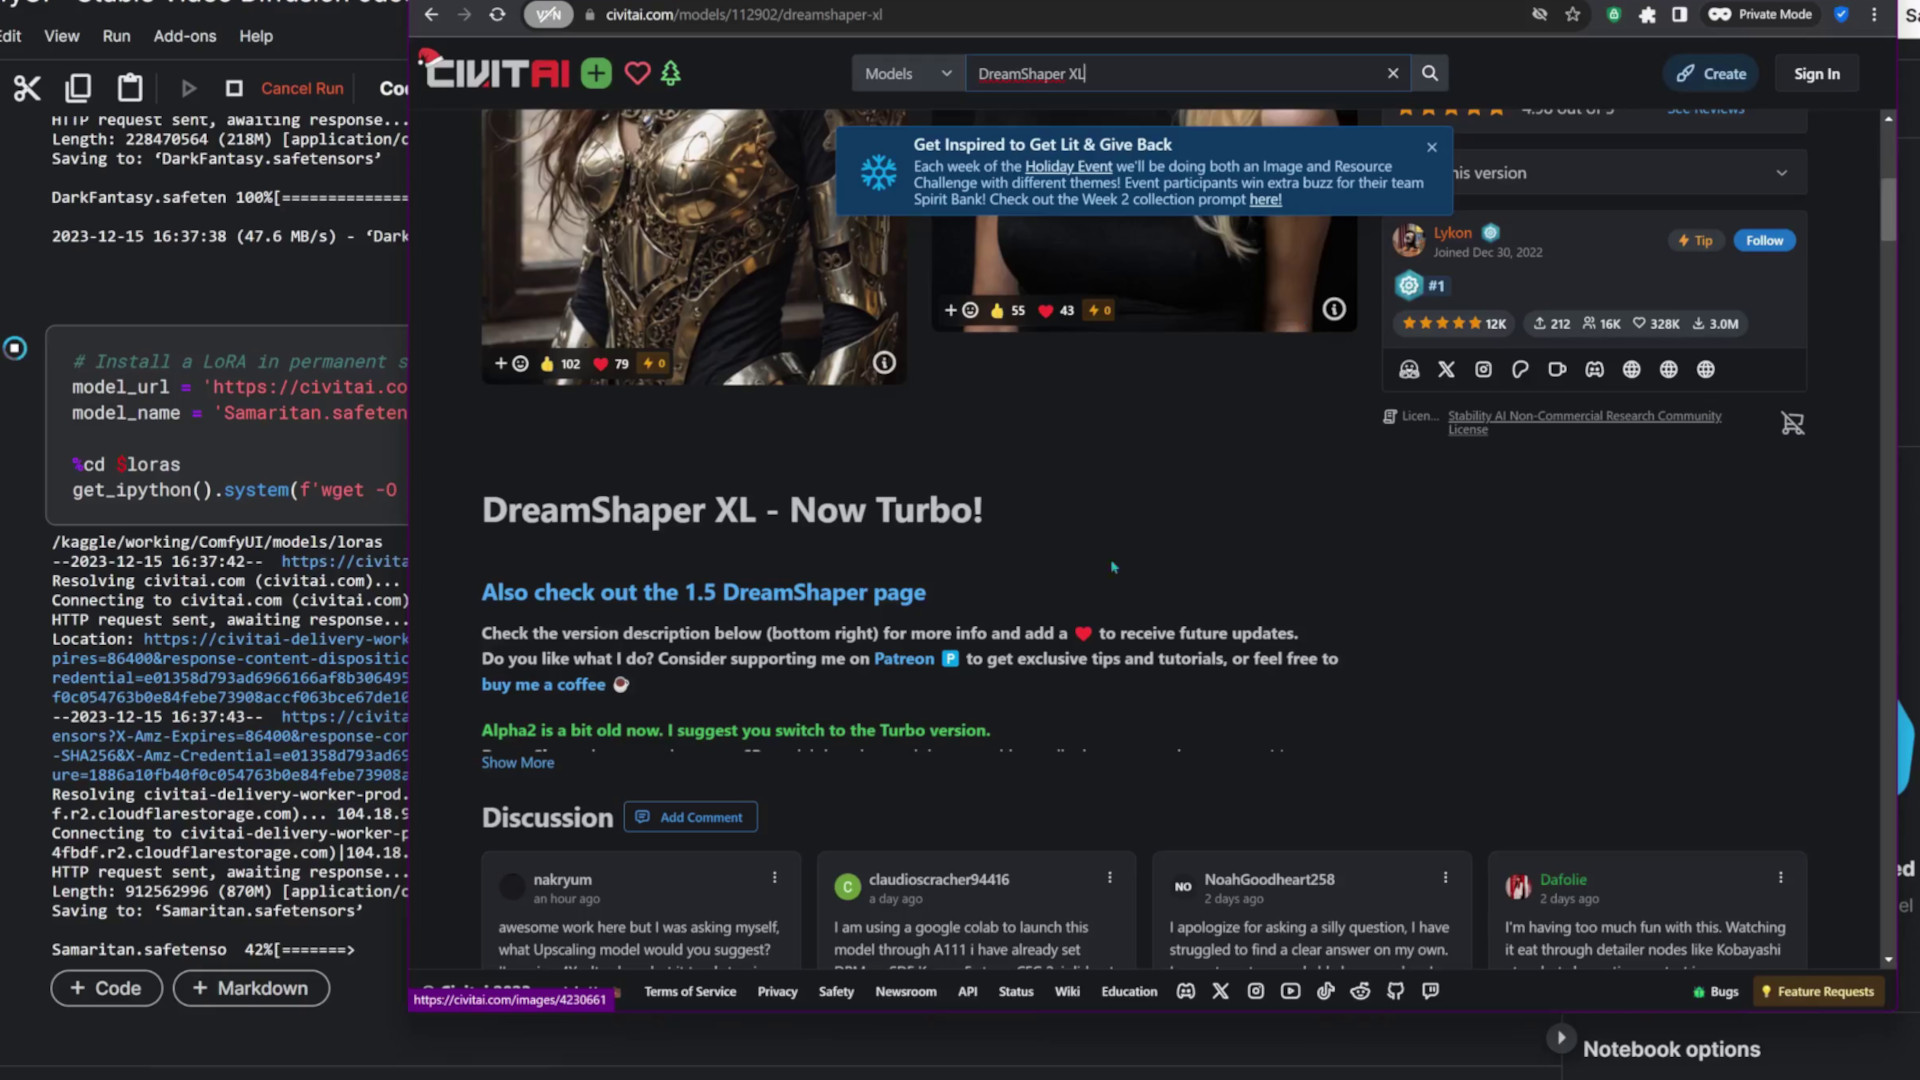
Image-to-Video (Example 2)
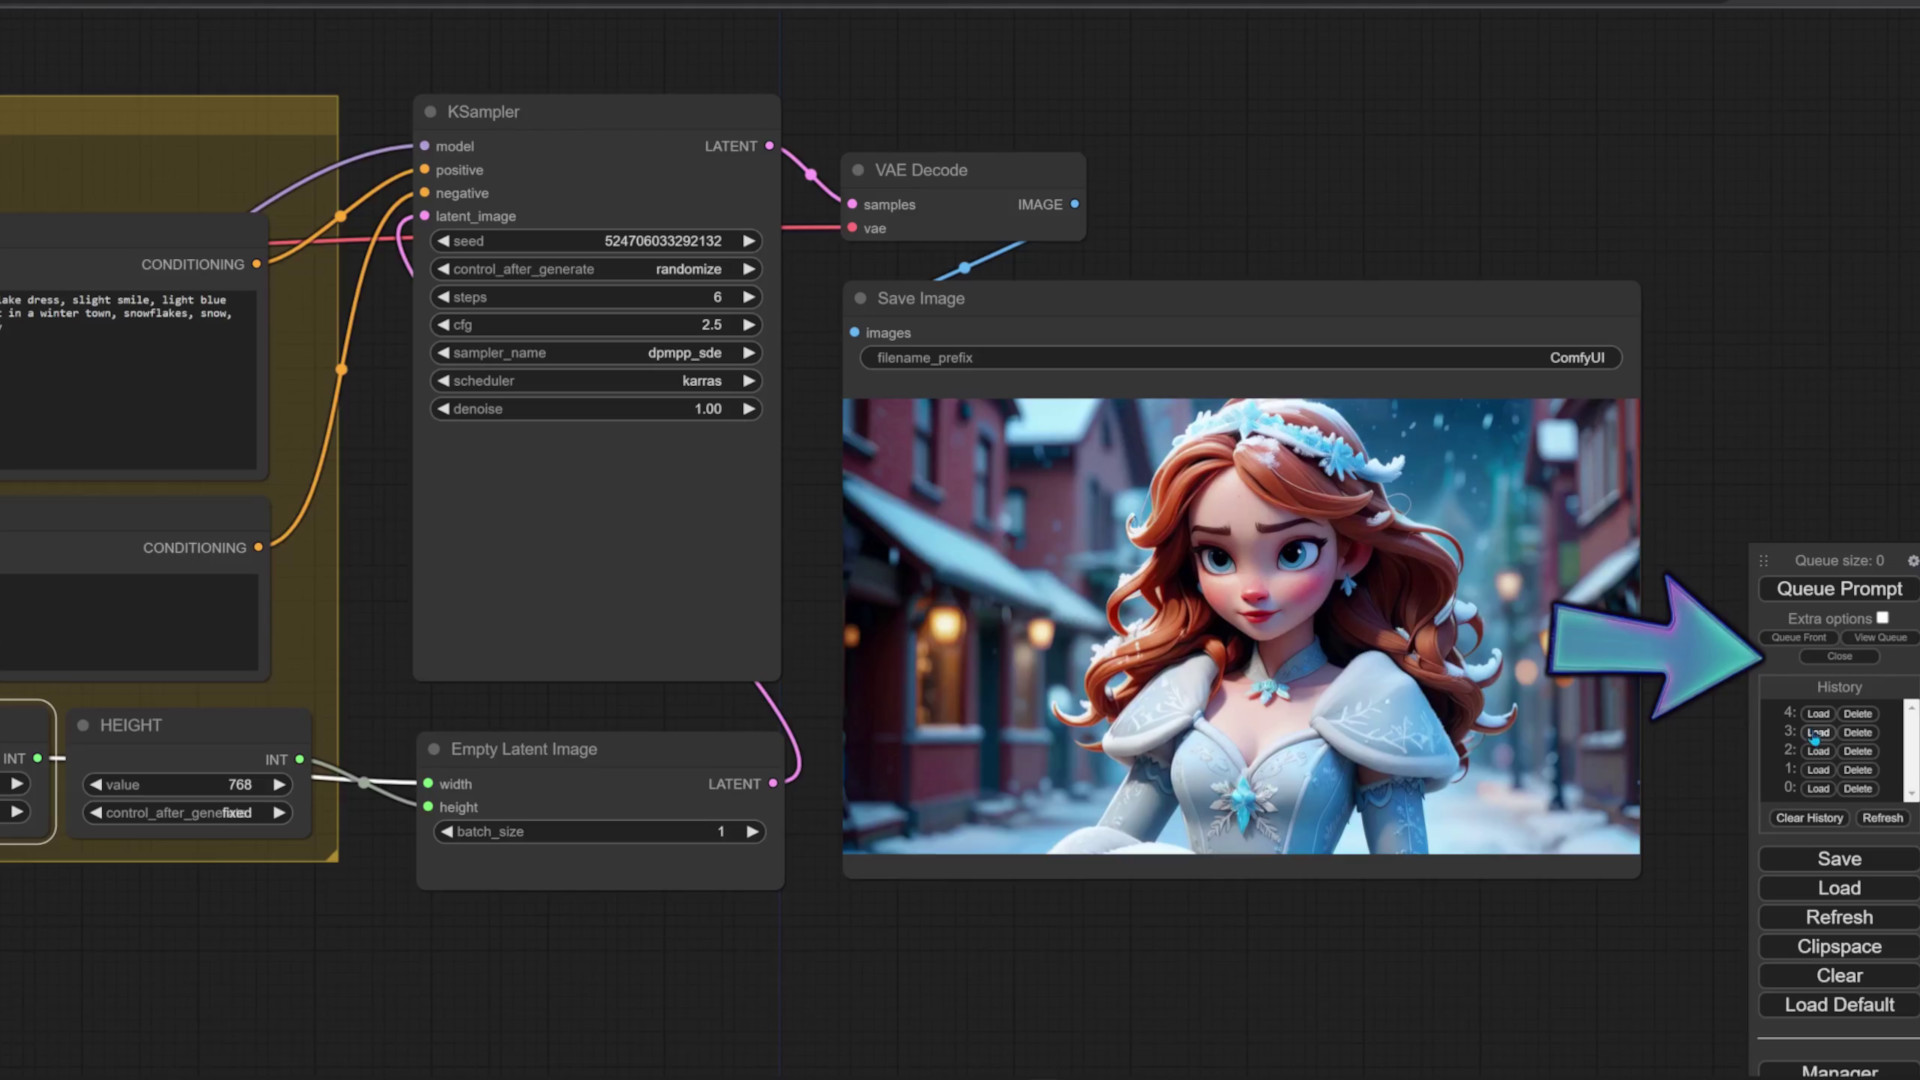
With the models in place, let’s create an image for our next video. Fire up the app, import the text-to-image workflow, and play around with parameters. To enable a LoRA, type 1 into the “Use LoRA” field. This workflow lets us use up to two LoRAs. I’ve chosen Samaritan and Dark Fantasy. The FreeU node below tends to make the images more vibrant and eye catchy. For the prompt, I’ll describe an ice princess walking through a small town in winter. I’ll choose a landscape mode resolution. Because we’re using a Turbo model, i’ll make sure the step count is low enough, and select a scheduler that works best with this model. I’ll download the best image for the next step. You can use the History list to browse recently generated images, or download them from the notebook.
To make the video, drop the image-to-video-autoscale workflow to ComfyUI, and drop the image into the Load image node. Just like with images, ancestral samplers work better on people, so I’ve selected one of those. i’ve found that simple and uniform schedulers work very well.
Change the Resolution
This workflow automatically calculates the video’s resolution to keep the shape of the original image. If you want to crop the image, for example, to create a square video, try the Image-to-Video workflow. When selecting a resolution, keep in mind that the video diffusion model was trained on 576 by 1024 pixels, so it helps to stay close to that. Using a lower resolution will also prevent issues such as running out of memory. If this does happen, save your workflow to keep the changes you made, and restart the WebUI step. If you need a shorter video, you can switch from svd_xt to the svd model, and lower the frame count to 14 which works best with that model. I often repeat the video generation with different seeds for varied outputs. If the animation turned out ok, but you didn’t get the effect you wanted, it’s worth it to try a few more times with small tweaks.
Keep Improving! (Example 3)
Speaking of trying again, we have one more example, this time with a text logo, highlighting this inevitable part of the AI creative process.
This example uses the CyberpunkAI and Harrlogos LoRAs. We’ll import the workflow by dragging an image previously created with ComfyUI to the workflow area. This image is available to download in the text-logo-example folder. Each image has the entire workflow that created it embedded as meta-data, so, if you create an image you like and want to tweak the parameters, simply drag the image to ComfyUI, and it will recreate the whole workflow with the needed parameters. I’ll run this workflow, but increase the step count to 9. 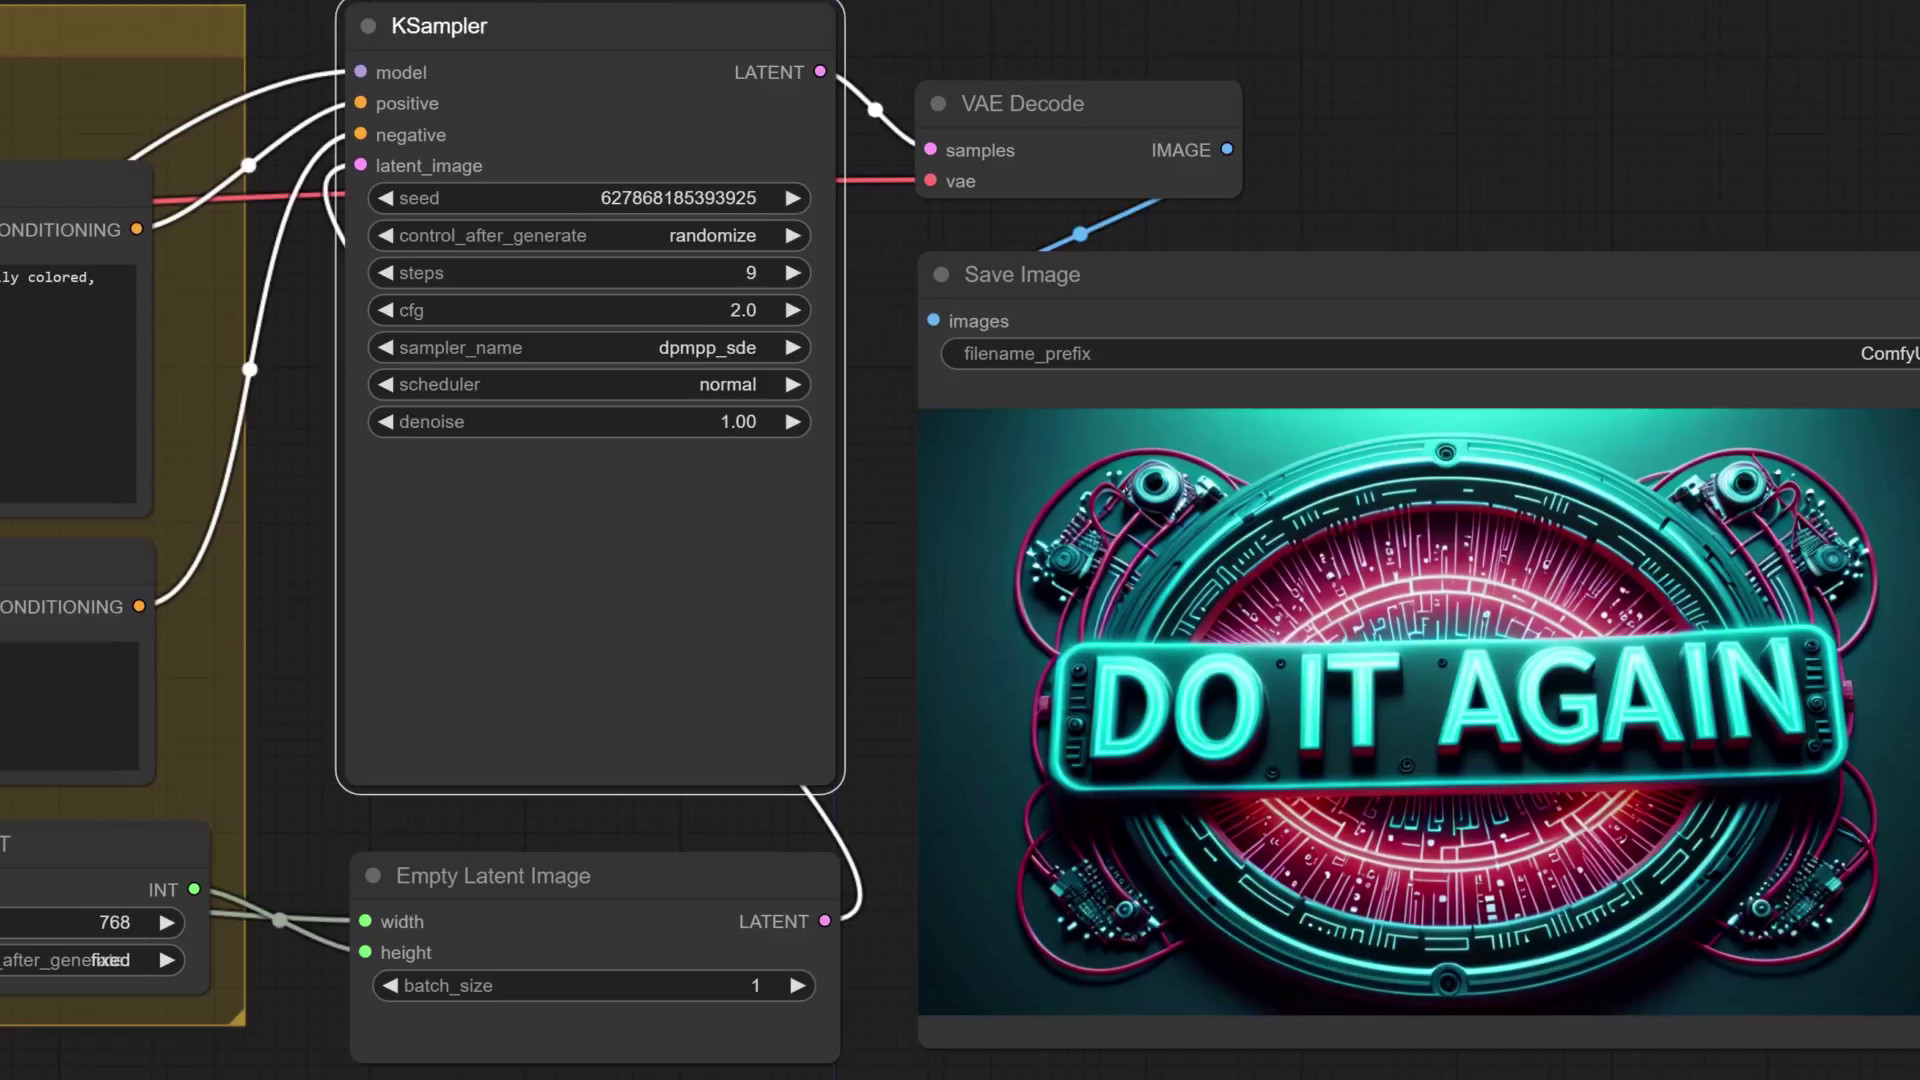
The video workflow will also be embedded in the image that gets saved alongside a video. Now, open the image-to-video workflow and give it the new image. All that’s left to do is run the workflow. And here’s our AI generated motivation to never stop trying and improving!
Save and Share
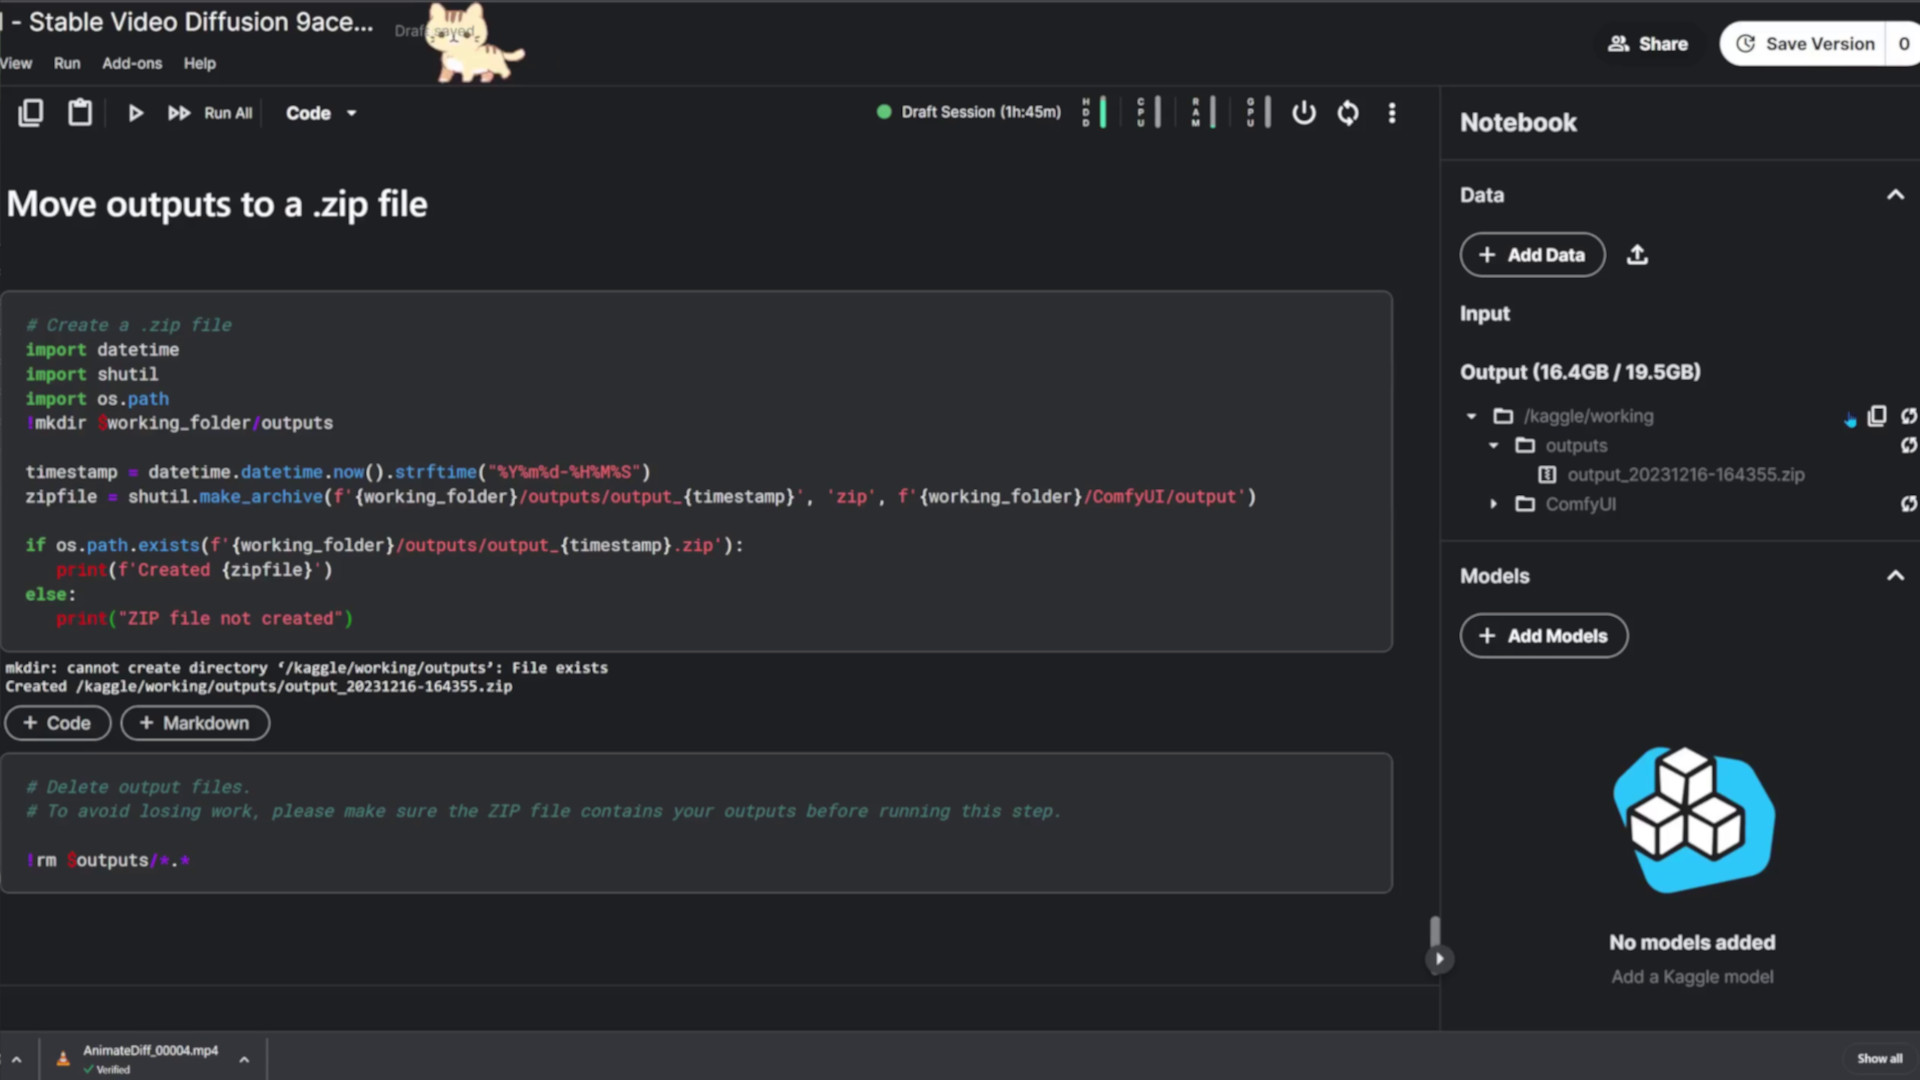
Let’s make sure we have our work saved so we can share it with friends. Close to the bottom of the notebook, there’s a code block that zips all outputs to make this task easier. Now there’s only one file to download! If the file doesn’t show up in the file manager, try hitting the refresh button, or reload the whole page in your browser. Now you can explore the images and animations offline on your PC. After you’ve verified you have all your creations, you can run the delete block to free up the outputs folder, which will make new videos and images easier to find.
That's a wrap on our quick introduction to AI video creation! For more prompt ideas and updates on new workflows, follow us on Instagram. Have a blast exploring the creative possibilities. Thanks for tuning in, and until next time, keep creating!